Robots Week 1 Reflection

IMG_2868.JPG


Well, we had our first robot day!  It went excellent.  Here are some reflections I have after our first week.

Videoing the whole thing is annoying.  It takes a whole week for me to put a video together for the kids who missed.  However, being able to project my iPhone’s camera on the screen was very much worth it.  I notice the kids are watching on the screen rather than trying to see the robot from across the room.  I thought, hmm.  Why don’t I just play the demo as a video?  I could.  But I think it’s better to have the live robot in the room.  They could ask me to repeat it or ask questions about it that they wouldn’t be able to ask a video.

I love the schedule I’ve set up to introduce concepts.  I explain the block first, then I show them the code for the first program.  They make predictions on a form they will turn in.  Then I show them the program on the robot and they reflect on how it went.  I think I will carry this process into other coding lessons.  It’s really helpful to ask kids to interpret code that has already been constructed before I ask them to construct their own.  That’s something a lot of coding camp type lessons just don’t get.

I was nervous on day one that we would move too quickly, that I didn’t have enough demonstrations prepared.  Nope.  That has not been a problem.  If anything we are moving too slowly, but I had time on Robot Day to catch up if I needed too.

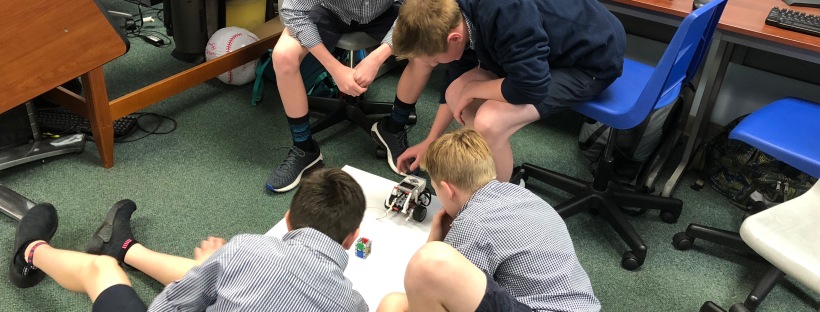
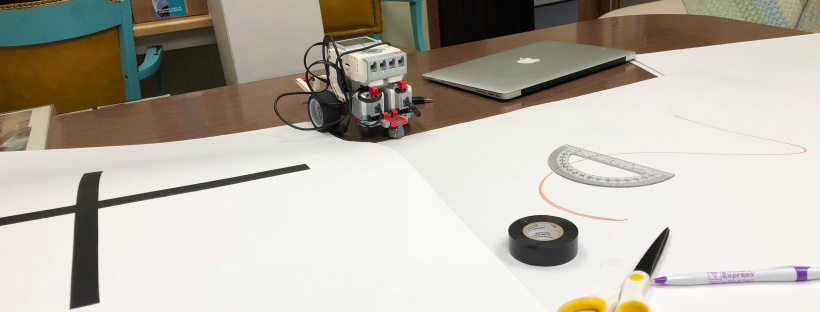
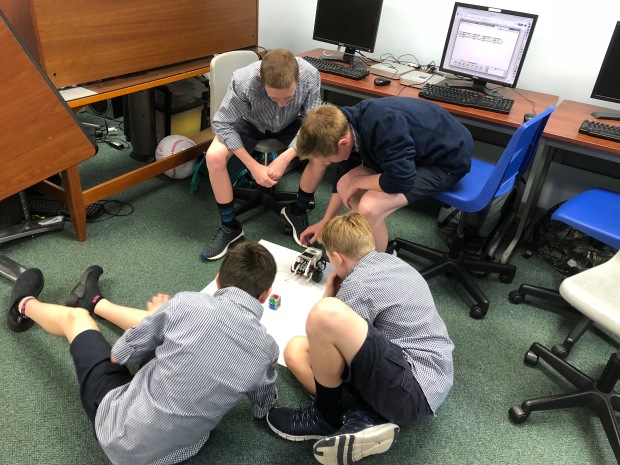
Ah Robot Day.  The challenge this week was to make your robot move forward, pick up an object, and bring it back.  I had little rectangular Lego objects and paper balls for them to collect.  They both worked fine.  I set out the cardboard and assigned them work areas by group.  They were instructed to pseudocode first, while I distributed robots and USB cables.

I asked them to follow the following process when working the problem:

  1. Identify the Challenge – make sure everyone in your group understands the goals.
  2. Design a solution – this is the pseudocode phase.  They are to use plain English to lest every detail in order, each step that their robot will need to accomplish.  They may choose to break the challenge into parts and work through this process for each part separately before they bring it all together.
  3. Develop the program – this is where they take their plan, their pseudocode, and turn it into a Mindstorms program.
  4. Load and Test the program – they use the USB cable to load the program onto the robot and run the robot.  (It was important to tell the to unplug the USB cable because many of them didn’t think to do that on their own.)
  5. Observe the results – it’s important for them to observe the results carefully, with detail.  If it didn’t go far enough, how not far enough was it?
  6. Identify the parts that need improvement and repeat steps 2-6 until it’s working correctly.

All in all it went great.  I had one group with a physical issue with a robot – I borrowed these robots already constructed from the robotics team, and didn’t notice that it wasn’t set up quite right.  The rest of the groups were able to achieve the challenge.  Most of the groups needed help loading the software, but once I showed them they could do it on their own.  In fact, most groups finished with time to spare.  I encouraged them to challenge themselves and experiment with the robot a little bit.  I believe I need to include a bonus challenge for those groups that finish quickly.  I don’t think the kids got bored with experimenting, but it makes me nervous as my goals are carefully constructed to keep the robots safe and that isn’t always their priority.

As I moved around the room, I watched them collaborating, brainstorming, and troubleshooting.  Exactly what I wanted.  They were clearly proud of themselves when they accomplished their task.  All the students seemed engaged.  Probably because of the novelty of the robot, but I will take it.

Next week we learn to make it turn.  I’m excited.  Incorporating robots has been an excellent choice!

Learning to Program with Robots 1 – The plan

I have decided to implement an introduction to robotics in my 7th grade computer science course.  Why?  Because when you break the unit down to the learning goals, they can learn the same fundamentals – program flow, precision, iteration, troubleshooting, solving problems with algorithms – using any programming platform.  I could use scratch, python, or robots to teach this.  So my question is then, why not robots?  Robots are expensive.  True, but we have some sitting in a closet that no one is using right now.  It might be hard to set this up for a whole class.  Yeah, it might.  But I have a plan that I think will work out ok.  Robots are complicated. Not with the lego software.  My school paid for me to do a robotics training from Carnegie Melon.  The curriculum broke it down really nicely and I see exactly how it can work with my curriculum.  Robots provide a hands on experience with coding, and I think it’s going to be a great unit.  I hope.

The Plan

I plan to instruct by starting with a demonstration.  I will explain how a concept works, then run a few programs that illustrate the concept.  I will show them the program, they will predict what the program will do, I will run the program, and they will make observations and reflect on the accuracy of their prediction.  Then they will make a similar program for themselves.  There also may be a quiz about the concept.  After we have learned a few concepts, they will work as teams to complete challenges.  That’s when they will get to load their programs onto robots and troubleshoot them.  Then I will repeat the cycle – demonstration, do it yourself, quiz, and team challenges.  They will learn to make the robot move around and lift its arm.  They will learn to use looping to simplify their projects.

The Setup

Demonstrations

I’m going to set up a table for demonstrations in the front of the room.  I will run a robot on that table.  I will set up my phone as a camera to record the demonstrations, and link it to my laptop so I can project the demo on the screen.  I’ll start with the labview software on my laptop to show them the program, then switch to the video of the robot so they can all see what it’s doing from around the classroom.  The students will have their worksheets, so I’ll have to pause before each demonstration so they can make predictions and reflect on observations.

Robot Day

We have one 90 minute period each week.  That will be our robot day.  I will have the class divided into 6 teams, one for each of the robots that I have.  I will clear all the tables and chairs from the middle of the room.  I will place a piece of posterboard on the floor for each group.  The students will work at their computers to write code, and then run their robots on their posterboard.  It would be best if I had teams of three, but most of my groups will be four or five students because I have more than 20 students in most of my classes.

Here’s a link to my unit design document.  I’m finishing up all of the components in our LMS and will be implementing the unit on Monday.  Here goes nothing!

ADDIE in the Real World: A model for unit/course development

How do you integrate an LMS into your work as a k-12 classroom teacher?  How do you balance the time it takes to develop and import content into an LMS with the time you need to spend assessing and managing a classroom?  How do you remember which things you have ready online now that you don’t see paper copies in front of you?

pixabay-1782427.pngThese are great questions and real challenges.  I don’t have all the answers.  I sometimes spend too much time developing and let assessments pile up.  Every once in a while I have to say “hang on” while I publish something I thought I’d published.  I definitely have moments when my students are working through the technical “how” of my instructions and I think, oh, there’s this other better way I should have had them working through that.

I’ve been using an LMS for … 6 years?  To manage the content for my computer courses (which are largely digital in nature).  I’m now using my second (well, and a half kind of) LMS.  Shifting to a new LMS has been a great moment for me to evaluate my courses and assess how I put my content together.  I’ve developed a system for solving the problem – “I need to develop cohesive units and I need to get my activities and assessments loaded into the LMS”.  It also solves the more pressing problem “What on earth are we doing in class tomorrow???”  I share not because it’s perfect, but because it’s an idea that can start a conversation, maybe in your own head, about how might go about the process of developing your courses.

In the world of instructional design and corporate training, there is a model for this.  It’s called ADDIE – Assess, Design, Develop, Implement, and Evaluate.  K-12 teachers tend to not hear much about that because it triggers that knee-jerk reaction “Clearly these fools have never been in a classroom.  They don’t know how it really is to do my job.”  What I do actually does follow that model in a streamlined way, and I’m going to use it to outline my process.

A – ASSESS

In corporate ADDIIE, the assessment phase gets a lot of focus.  Usually because an instructional designer may be brought in to a company with zero background knowledge of the instruction that is to be delivered.  So they need this assessment piece to survey, pre-test, observe, interview stakeholders, etc.  And that’s where the classroom teacher has zoned out.  We don’t do this in a formal way very often.  We might use a pre-test, but often that is more about evaluating our instruction at the end than developing it at the beginning.  There’s just not time to give the kids a pretest on Monday and develop the whole unit by Tuesday.  We may have some access to standardized test results from the previous year, but we must do a lot of developing before the students appear.

When I assess, what I’m really doing is looking at my standards and previous instruction that I have done.  I may do a little research into the topic, a survey of what others seem to think is important about this topic, and what resources are available to me.  This is the phase where I’m considering the question “What is this unit going to cover?  Where are we going?  What’s the point?”  and then “What kinds of things am I going to do to get us there?”  It’s that first bit of brainstorming to determine the scope and sequence of this particular unit within the scope and sequence of my course and the courses in my department.  I should probably also note that I don’t have a textbook.   I don’t have a prescribed curriculum that I must follow.  If I did, this would look a little different.

D – Design

My assess phase flows right into my design phase, and sometimes they overlap.  I have developed a template that I use to make this process flow more smoothly.  I don’t complete all the pieces in order, it’s more a back and forth, up and down kind of process.  I must record for myself what the point of the unit is, the objectives/essential questions/ essential understandings, and how I will assess those.  I use tables to map how activities align with objectives and make sure assessments align with objectives.  As I’m considering activities I make myself a list of resources.  This serves as a to do list for all the things I will need to develop or import into the LMS.  I put all of my things into the LMS, but if I had some print things and some online things, I would list all of them here so I wouldn’t leave myself without something I need.

I DON’T DEVELOP WHILE I’M DESIGNING.  Oh, did I use all caps for that?  I did.  I did because it’s important.   When I get excited about activities and go off and start designing them, I miss pieces in the design process.  That’s when I’m likely to skip components that need to be present in the LMS.  I may make a note of something in a comment if I want to remember it, but it’s important for me to see the design process through before I develop anything.

I do plan carefully – will this be an online quiz?  If they will watch this video, how will I assess their understanding?  Will this be formative or summative?  Will I assess for completion? (Don’t jump on me, sometimes that’s the only assessment for computer tasks – did you get the computer to do it or not?)  Will I use a rubric?

I finish off my design process with an estimated daily schedule.  It’s subject to change, but it helps me think about how long this will take and where it fits in my year.  It also gives me a nice brief description to copy and paste into the lesson plans section of the school SIS.

D – Develop

By this point, I have a checklist to follow of all the things I need to create or find.  As I do that, sometimes I have to go back and adjust the design document.  Which is fine, but for the most part, I simply go through the checklist and make sure each item goes into canvas.  It’s best if I can get all the pieces together before I launch the first item or I’m playing keep-up with the kids, which is not a fun game.

In my design document, I had a category for Blooms taxonomy, but that’s too much to think about.  I have adjusted that to whether it is an Absorb, Do, or Connect activity (Horton, 2006).  This is much simpler to think about and it get’s to the same thing.  Are they absorbing information?  Doing something with the information? Or are they doing some higher order thinking to connect the ideas with other ideas?

I – Implement

Here’s where I push publish and guide my students through the process.  And it’s also something that is different for K-12 educators when compared to corporate or even college educators.  The implementation time is inflexible.  I have X number of hours spread over X number of days that I must implement this information.  If it tanks, I don’t get extra time at the end of the year to fix it.  If it’s too easy, I have to develop more to keep my kids challenged.  Things like snow days and fire drills throw the timing of activities.

The extent to which students self-guide themselves through the learning process varies by age and unit.  It’s possible to train students to go on to the next thing, but typically I conduct my courses by providing all of the verbal instructions necessary in class, even though it is also written in the LMS.  Students seem to do best when they receive their marching orders from me.  I also do in-class demonstrations for various things.  Sometimes I need to demonstrate the content, sometimes I need to demonstrate how to use the LMS in the way I want them to for this particular activity.  I find it’s important to give space for students to ask questions, and to reflect in class on their activities even though many of these things could be conducted online.

E – Evaluate

When we discuss online learning, it’s essential not to lose the evaluation piece.  Once the unit has been developed and put online, it’s tempting to call it done and leave it there for the next 30 years.  Evaluating may be a formal process – evaluating how students performed on specific parts of assessments, conducting a survey at the end of a unit – or it may be more informal – reflecting on how engaged students seemed to be, reflecting on how quickly components were completed.  This essential data feeds a new ADDIE cycle.

Sometimes the next ADDIE cycle begins in the middle of implementation – it’s clear that students need extra practice.  That triggers a really quick ADDIE process – what do they need more practice with?  What activity do I need to provide that practice? And then comes the process of developing and implementing that activity.

Other times the next cycle takes place “sometime before next year”.  Perhaps at the end of the unit, or the year, the teacher assesses that the unit needs some adjustments.  Perhaps it was too easy, perhaps it didn’t accomplish the goals.  Perhaps there’s something else that needs to be included in the year and it needs to be made shorter.  Perhaps there were too many non-essential tasks.

Finally, some thoughts about timing.

This works best for me when the development of part of the process is fully complete before the implementation date.  If my unit is going to tank, it’s going to tank because I had to launch the first part before I had the rest of it developed and I’m limping along trying to develop as I go.

On the other hand, developing the next unit while I’m working on a unit drastically hinders my ability to focus on the unit at hand and assess student work in a timely manner.  The first year in a course, when all units are in development, is extremely difficult to pace.

Starting a semester with units in place is the best way to use an LMS.  Having gone through A,D,and D one time per unit before the school year starts allows time for thorough evaluation and redesign as necessary, as well as space for careful student assessment.

Once I’m in my second year with a unit, I can review the design document, assess areas for adjustment, and make those adjustments (ADDIE all over again).  However, some of the pressure is off.  I can prioritize the things that MOST need changed, and if I don’t get to all of the changes, at least I have what I did last year.  This ability to reuse provides time to do all of the things that I just didn’t have time for in the first run through.


More Resources

The idea of Absorb, Do, and Connect comes from:

Horton, W. (2006). E-learning by design. San Francisco, CA: Pfeiffer.

Absorb, Do, and Connect examples are available at at:

https://horton.com/additional-resources/e-learning-examples/

The ADDIE model is outlined in several resources, the book I read was:

Larson, Miriam B. (2014). Streamlined ID : a practical guide to instructional design. New York: Routledge, Taylor & Francis Group.


SaveSave

SaveSave
4 Things I’ll Be Changing After a Course in Multimedia

For context, I currently teach 6-7th grade computers.  I’m likely going to be looking very closely at 4th-7th grade computer curriculum in the near future – the  scope and sequence of our required computer courses.  These are the years we teach computers to all students.  They can elect to take courses like Web Design and AP Computer Science in the high school, but the 4th-7th grade courses are the ones we use to develop computer literacy that will be helpful for all students.  All of my students have devices, and I deliver a lot of instruction online.  However, the students complete all coursework in class.  Delivering content online allows students to complete activities at different paces, but working in a face-to-face classroom allows students to help each other and work in design teams for some projects.  It also allows me to keep them on task and make verbal clarifications regarding instructions.  I think it’s the perfect learning environment.  It’s also really important that I make wise choices about what multimedia content I include in my courses because it is such a big part of my class.

  1. Use more faded worked examples. I am working to develop a library of how-to videos that I can use to instruct students.  There are units in my 7th grade class in which almost 100% of the instruction comes from videos that I have made.  I believe that videos are going to be really helpful as I work toward a cohesive 4th-7th scope and sequence because there are always new students who have not learned a specific task.  Having a video of the instruction allows those students to catch up quickly and independently as necessary.  The idea of a faded worked example is new to me and I look forward to using it to increase student learning from my how to videos.
  2. Be more intentional about promoting far transfer.  The idea of making sure to give examples in a variety of contexts makes a lot of sense in my computer classroom.  I believe this way of thinking can help prepare my students to apply what they are learning in a new application that may not even exist yet.  I think that by giving examples in a variety of applications that do exist, I can prepare them for future applications.  I’m thinking specifically about a blog portfolio project.  I currently teach the students how to create a blog using one platform.  I hope they transfer the skills to other WYSIWIG systems.  But what if I am intentional in the curriculum about developing WYSIWIG skills in a variety of platforms so they can see how it is similar and different in a variety of contexts?
  3. Implement multimedia principles in my instruction about slideshows.  I have known that it’s generally a good idea to avoid using a large volume of words and distracting pictures in slideshows, but I appreciate having research-based principles that I can recommend to my students and also to share with my fellow teachers.  I find that often students are asked to create presentations for other classes and the requirements violate good multimedia principles.  I look forward to helping my students understand how to make better presentations and also how my teachers can support them in this endeavor.
  4. Apply multimedia principles when creating and selecting instructional media.  I think multimedia is a helpful tool for instruction in many disciplines.  As the multimedia principle states, it helps people learn better if used well.  Tools like Google Classroom or YouTube and email make it easy for teachers to provide multimedia learning experiences that face to face students can rewatch as necessary.  I am excited to have a framework to help me make decisions about which multimedia to use.  When I started teaching I was excited if I found a video at all that related to my content.  Now I can find multiple videos on popular content and I can make them myself.  By looking at principles of coherence, modality, personalization, contiguity, and redundancy I believe I will be able to weed out many options.  When taking the time to make a video, I can make choices that align with these principles and know that my efforts are not in vain.

Faded Worked Example

This was a fun assignment.  A faded worked example is one in which learners are presented with a series of examples.  Each time the number of steps demonstrated decreases and the number of steps that the students are asked to do on their own increases until at last the learner is required to do the whole problem on their own.  I chose to make a faded worked example about how to use spreadsheet functions.  I decided to keep it simple and focus on the SUM and AVERAGE functions, though the steps would apply for any functions.

I used Camtasia to record my screen.  My favorite thing about Camtasia is that it makes it really easy to start and stop and start over when recording the screen.  In my opinion, the most frustrating thing about recording video is when you get tongue tied and have to start over, or the dog starts whining, or a firetruck goes by.  I appreciate a program that makes it easy to restart and to edit recordings.  I find it’s best to record in chunks and then stitch those chunks together rather than trying to record the whole video in one take.

For this specific assignment, I chose to apply the segmenting principle and made each example a separate video to give the learners control over the pacing.  This is a lesson I can see myself incorporating in my classes so I set it up so that I can easily assign it through Google Drive.  The lesson is hosted in a Google Document.  The learner reads instructions and clicks on one example, then can access the example document to see how it works.  Then the learner goes on to the next example and is required to edit the sample document to complete the third step.  The third example gives the learner one step and requires them to complete the last two on the sample spreadsheet.  Finally, the Google Document delivers an assignment – to use a spreadsheet to plan for expenses.

I was careful to choose four different contexts to make sure that the learner could experience spreadsheets in a variety of applications.  My intent is to create far transfer so that learners will be prepared to use spreadsheets to assist them in their lives outside of my classroom.

Here is the link to my Google Document.  All of the Youtube Videos and example spreadsheets can be found in the document.

Here are my videos for your viewing convenience.  However, make sure to check out the Google Document to see them in context.

Chunked Presentation on Worked Examples

This assignment was to apply what I learned in Chapter 10:  “Applying the Segmenting and Pretraining Principles” to make a Slides Presentation about Chapter 12: “Leveraging Examples in E-learning”.  I felt as though the information in Chapter 12 was rather easy to break down into parts.  I used a different color for each different part, and I used a title slide to separate the presentation into those parts.  I was careful to limit the number of words on each slide.  I created a new slide for each principle and made sure each idea had its own slide.  I used the speaker notes for the important information, because it’s best for learners to hear the information rather than try to read and listen to it.

Here’s my presentation on Google Slides.

This is what it looks like embedded, but you should make sure to check out the speaker notes!

Digital Story

I found it quite challenging to pull together all the components of a good digital story.  To have a good plot that is relatable and also can be illustrated with pictures in a reasonably long video takes careful planning.  I chose to tell the story of how I learned to ski because it has a main character – who has a goal – learning to ski – that I must overcome obstacles to attain.  I also knew that it would be easy to come up with pictures.

I recorded and created my digital story on camtasia.

Without further rambling, my digital story is available on Youtube Here.  

Coherence Analysis

The coherence principle presented by Clark and Mayer instructs e-learning designers to avoid adding or including material that does not support the instructional goal (Clark & Mayer, 2016).  The premise for this principle is that learners have a limited capacity for processing and that capacity should be reserved for material that is directly related to the instructional goals.  Clark and Mayer examined whether this principle applies for words, graphics, and or sounds.  They found that e-learning works best when extraneous words, graphics, and sounds are avoided.

Words, graphics, and audio come at a cost.  There is a cost to produce these items.  Including them requires additional data storage and transmission capabilities and can make the lesson slower to access.  When learners are paid for time in a training seat or paying for that instructional time, extra content has a real cost.  However, the cost that should make e-learning desires most committed to excluding extra material is that it takes away from a learner’s already limited processing capacity.

E-learning designers are often tempted to include stories, trivia, decorative or entertaining graphics, background music, and/or sound effects because these things make their e-learning activity more interesting.  It’s based on the idea that if you can stimulate emotional interest, you can stimulate cognitive interest. (Clark & Mayer, 2016) This idea is great, if the emotional interest is focused on the relevant content.  Adding interesting content that isn’t relevant can arouse emotional interest, but it’s not focused on the relevant content so it doesn’t contribute to improved learning.

One example of the desire to arouse that comes to mind quickly is the “Crash Course in US History”  Series by Josh Green. Mr. Green does an excellent job of including interesting and relevant graphics.  His videos are fun and interesting to watch.  However, upon further analysis, it’s clear that not all of the graphics, words, and sound effects that he uses are directly related to the learning goals.  I’ll talk specifically about US History Episode 1, but the whole series features a similar style.  This lesson is titled “The Black Legend, Native Americans, and Spaniards”.  Based on a review of the description, the learning goals would have to do with the earliest Spanish settlements in the new world and their interactions with Native Americans.  One could argue that the first 45 seconds are an introduction to the whole US history series and therefore the image of the moon and the “America” graphic with music and Tippecanoe are related to that whole course introduction.  Fair enough.  From the start learners are presented with a series of images at a fast pace.  They illustrate the words that are being spoken, but are not relevant to the learning goal.  It takes a lot of processing to keep up with the images, and there’s not much point in making the effort because they are all illustrations of what these groups were not like.  Also, I spent way too much cognitive energy trying to figure out what the weird creature was on the chalkboard behind the instructor’s head.  And why is George Washington there, Mr. Green?  This video is engaging, and I think students might prefer it to reading a textbook, but I am not sure that it is as helpful as it could be if Mr. Green were to eliminate some of the distractions.  

A video that does a much better job of providing interesting graphics while ensuring that all of the graphics are directly related to the learning goal is this video from TedEd by Ben Labaree Jr.  The learning goals are related to the Kansas-Nebraska act and the influence it had in events leading up to the Civil War.  There are several moments throughout the video that the Mr. Labaree could have used to insert some entertaining graphic and audio in the style of John Green, however, he carefully designed each visual to support the learning goals.  In John Green’s style, a mention of the Civil War is opportunity to flash a picture of cannons blazing or wounded on a battlefield.  Mr. Labaree resisted that opportunity because such images don’t support the learning goal of understanding the impact of the Kansas Nebraska act.  Thinking about cannons or battlefields is a distraction from thinking about the opinions of northern and southern senators.  The graphics in this video are well designed but not distracting.  Perhaps I’m biased because I like history, but I find the video is plenty interesting.  At the end of the video it’s very easy for me to identify who and what the video was about.

I can think of several examples of ways the coherence principle is violated when instructors attempt to create and use e-learning materials.  I have seen videos with background music for no instructional reason (Moreno & Mayer, 2000).  In online text I have seen little boxes presented of random trivia or extra information that was irrelevant to the learning goals. (Lehman, Schraw, McCrudden & Hartley, 2007)  I have seen instructors include decorative graphics in an attempt to make their simple presentation look more interesting, but research indicates that this is not helpful (Mayer, Heiser, & Lonn, 2001) Often the clip art available seems related but is not relevant, yet instructors use it because they feel pressured to have graphics and don’t have time to find or create something more relevant.  I have seen instructions that included additional words to add technical depth beyond the learning objectives.  While this might seem like a good idea, the additional information may distract the learner from achieving the learning goals.  (Mayer & Jackson, 2005, Verkoeijen & Tabbers, 2009)

The coherence principle provides a constraint for the other principles of multimedia, contiguity, modality, and redundancy.  The multimedia principle encourages designers to include graphics with words, and the coherence principle cautions that those graphics must be relevant to the learning goals.  The contiguity principle encourages designers to design in such a way that learners encounter the words and pictures at the same time.  The coherence principle cautions that those words and pictures won’t help if they are not related to the learning goals.  Modality encourages designers to present words as audio narration with graphics.  The coherence principle cautions that those words must still be relevant to learning goals.  The redundancy principle encourages designers that they should usually refrain from putting words that learners are listening to on the screen.  Without the coherence principle, designers might be tempted to take liberties with those words since they aren’t on the screen, but the coherence principle reminds them to keep those words in alignment with the learning goals.

The coherence principle is dependent on psychological theories and exposes a limit for the arousal theory.  The coherence principle is depending upon cognitive theories which state that learners have a limited capacity for cognitive processing.  The coherence principle seems to be in conflict with the arousal theory which states that learners learn better when they have greater emotional interest. (Clark & Mayer, 2016)  However, the coherence principle does not contradict the arousal theory because it leaves room for emotional interest as long as that emotional interest is directly related to the learning goals.  It’s only when the emotional interest is not focused on learning goals that learning is diminished.

In my opinion, the coherence principle is an important principle to consider, but I would argue that it may not be a law to apply in all situations at all times.  Certainly it is a good principle to follow in most times for most learners.  Clark and Mayer used the term “decorative graphics” frequently in their description of extraneous images. (Clark & Mayer, 2016)  Often I have observed that educators attempt to insert decorative graphics as an attempt to make their work more visually appealing and cover up for a lack of understanding of graphics design principles.  I believe educators should consider the value of white space, font choice, contrast, and the alignment of items on a page rather than using images to make up for those deficiencies.  

I also believe that designing e-learning is quite different than providing classroom instruction.  While it is not explicit in learning objectives in courses, classroom instructors contribute to the social and emotional education of students.  Part of that includes sharing life lessons, updates on school and community events, and fostering appropriate relationships in the classroom.  It may seem natural to include such things when an instructor is creating an e-learning activity, but I think instructors should focus e-learning development on only those elements which are directly related to learning goals.  Those other goals can be met in other ways outside of a learning module.   

I believe the coherence principle is difficult to follow when it is difficult to determine which elements are relevant and which are simply related.  What seems relevant to one instructor may be merely related to another.  Designers should collaborate with others when the line between relevant and related is difficult to identify.  

In my opinion, there are more studies to be done in this area.  I would like to know if this principle applies as strongly for learners with more prior knowledge.  I would also like to know if it applies when the content does not require as much processing  For example when a group of high school students needs to learn a few things that are rather simple, is it okay to include related material that is entertaining?  Does this apply at all maturity levels?  I’m also not quite sure how well this principle relates to ideas about social connectivism and the importance of helping learners feel connected within a class, especially in an online class. When an instructor shares personal stories that are designed to develop relationships, is that extraneous?  Should that always be presented separate from the actual lessons?  

References:

Clark, R. C., & Mayer, R. E. (2016). E-learning and the science of instruction, 4th edition.  Hoboken, NJ:  John Wiley & Sons, Inc.

Lehman, S., Schraw, G., McCrudden, M.T., & Hartley, K. (2007).  Processing and recall of seductive details in scientific text.  Contemporary Educational Psychology, 32, 569-587.  DOI: 10.1016/j.cedpsych.2006.07.002

Mayer, R.E., Heiser, J., & Lonn, S. (2001).  Cognitive constraints on multimedia learning;  When presenting more material results in less understanding.  Journal of Educational Psychology, 93, 187-198.  DOI:  10.1037//0022-0663.93.1.187

Mayer, R.E. & Jackson, J. (2005).  The case for coherence in scientific explanations:  Quantitative details can hurt qualitative understanding.  Journal of Experimental Psychology: Applied, 11, 13-18.  DOI:  10.1037/1076-898X.11.1.13

Moreno, R., & Mayer, R. E. (2000).  A coherence effect in multimedia learning:  The case for minimizing irrelevant sounds in the design of multimedia instructional messages.  Journal of Educational Psychology, 92, 117-125.  DOI: 10.1037//0022 0663.92.1 117

Verkeoijen, P., & Tabbers, H. (2009).  When quantitative details impair qualitative understanding of multimedia lessons.  Educational Psychology, 29, 269-278.  DOI:  10.1080/01443410902795586

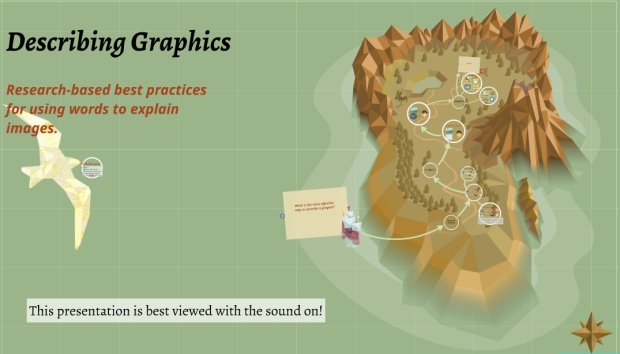
Modality Prezi

This assignment was to create a Prezi about chapter 6 or 7 of e-Learning and the Science of Instruction.  I feel like the Redundancy principle is somewhat dependent on the Modality principle.  The Modality principle provides the rationale that graphics should be described by audio rather than on screen text and the redundancy principle says that the text shouldn’t also be provided on screen.  I think you have to convince someone of the modality principle before you can convince them of the redundancy principle.  So, I decided to make my prezi about the Modality principle.

After reading the chapter, my first step was to storyboard the presentation.  I needed to think about the words that would be said out loud for each slide and determine what graphics I would need to illustrate the words.  I created graphics to illustrate the modality principle using Adobe Illustrator.  The graphics consist of icons from flaticons.com  that are arranged to create meaning.

Using the storyboard, I created my Prezi.  I chose a template and added stops as necessary to fit the storyboard.  I added graphics and on screen text for organization.  Then I scripted the audio.  I recorded each audio file in QuickTime, then imported it into the Prezi.  It’s always difficult for me to find a quiet space for recording audio.  I don’t have a private office or classroom at work, and my furry friends at home like to make noice exactly when I want them to be quiet.  I liked that I could add audio slide by slide in Prezi because I was able to record in short chunks.  When the dog whined or the colleague caughed, I didn’t have to redo long recordings.

Here’s My Prezi on the Modality Principle!

preziPreview

Reference:

Clark, R. C., & Mayer, R. E. (2016). E-learning and the science of instruction, 4th edition. Wiley: Hoboken, NJ.

Sloth Haiku Deck

I just got back from Costa Rica with a bunch of students.  The trip was arranged by my friend, a biology teacher.  She made sure we took the night tour in the tropical forest with a biologist and saw different levels of the forest from ground to canopy on hanging bridges and zip lines.  A group of girls had made it their singular goal to see a sloth on the trip.  I learned a lot about snakes – researching just how dangerous the ones we saw were, and birds – trying to figure out when and where I might see a Toucan, and wild cats – making sure we weren’t at risk to run into a jaguar.  But the thing that fascinated me the most was the lesson we got on sloths.  We ran into some sloth poop during our night tour and our guide told us all about sloths and sloth moths.  The last day in the mountains we got to see a sloth.  Our bus driver spotted it and stopped the bus so we could get out and take pictures.

When I had to make a haiku deck for Multimedia two days after we returned from our trip the sloth instantly came to mind.  It’s not a long story to tell, not super complicated, and it goes well with pictures.  I felt that I would be able to apply principles of multimedia and contiguity well with this topic.  It makes sense to use a sloth to introduce the idea of an ecosystem because there are only 4 organisms to talk about.  Many ecosystems involve a lot more organisms!   The first thing I did was write my speaker notes in a text editor.  Then I split them up and thought about what pictures I would use to illustrate them.  I needed to reorganize my words a little bit to make sure that all the words fit the picture that would be displayed during those words.

Haiku deck is a bit of a funny tool when thinking about putting words close to images because the speaker notes are all grouped on the side.  However, I created this project with the intent that the learner would be hearing the words while looking at the slide.  I kept the narration short for each slide.  I also made sure that the learner would be looking at a visual that connected with the narration.  I used minimal words on the screen because I wanted the learner to be verbally engaged with the audio narration rather than words on a screen.

The presentation makes zero sense without the speaker notes, and I think that is what the multimedia and contiguity principles indicate.  The visuals support the audio and the audio supports the visuals but neither stand very well alone.  When the narration talks about the sloth coming down the tree to eliminate waste, the learner should be looking at an image of that.  It might have been helpful to have an illustrator create graphics to show exactly what was going on or perhaps even an animator to show the sloth crawling down or the moths laying their eggs.  However, I was pleased with the images I was able to find.  It would be interesting to put a random picture of a sloth on every page, because that is the main character of the story, but it wouldn’t be helpful to the learner.  I was careful to find different pictures to illustrate each component of the narration.

I thought a lot about how helpful it is to have images to illustrate ideas while I was making this presentation.  The image of the single sloth moth is helpful.  That’s what the moth looks like.  But the image of the moths on the sloth is also really helpful because it clarifies how big the moths are, and that they are actually on the sloth.  Even having a picture of a sloth at all is helpful as most learners haven’t seen one in person.  Without the images, the narration would have had to describe the sloth and that would have been a lot more complex than simply including a picture.

And now, I present, my Haiku Deck.  Sloths: An ecosystem case study.